Guitar Anatomy – Parts of a Guitar

Ever stared at your guitar and thought, “What on earth is that thingamajig called?” or “Why does my guitar have a belly button?”
Fear not! We’re about to take you on a tour of your guitar’s anatomy, explaining each part in a way that even your grandmother can understand.
Table of Contents
Neck & Fretboard
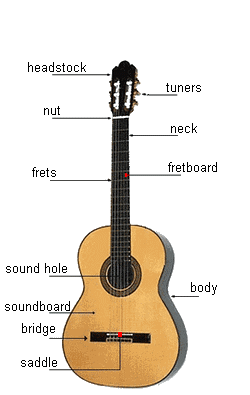
This is where the magic happens for your fingers! The guitar neck is one long piece of wood on which the fretboard with the frets and tuners are mounted. The beginning of the neck is called the heel and the end piece of the neck, headstock.

Fretboard (or Fingerboard): This is the front part of the neck where you press down on the strings to create different notes. Those metal strips you see? Those are the frets!
Frets: These metal strips divide the fretboard into sections. By pressing a string down behind a fret, you change the pitch of the note. Frets are stamped along the fretboard at exact points that divide the scale length according to a certain mathematical formula. The pitch of each consecutive fret is set at a half-step interval on the chromatic scale.
Standard classical guitars have 19 frets and electric guitars between 21 and 24 and sometimes 27 frets.
Position Markers (or Inlays): You might notice dots (or sometimes more fancy designs) on your fretboard. These are like road signs, helping you know where you are. Handy for when you’re shredding away and need to keep track!
Truss Rod: Hidden within the neck, this metal rod helps adjust the curvature of the neck. If the neck bends too much (or not enough), a truss rod tweak can bring things back in line.
Headstock
The headstock is like the crown jewel of your guitar. But it’s not just for show.
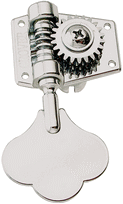
Tuning Pegs (or Machine Heads): These are the little knobs you twist and turn to get your strings in tune. Each peg corresponds to a string, letting you tighten or loosen it until you hit that sweet note.
Nut: No, not the edible kind! Situated right below the headstock, the nut is a tiny piece (often made of bone, plastic, or metal) with grooves to guide the strings onto the fretboard.
Body
This is where your guitar gets its voice (and where all those cool stickers go!).
Sound Hole: Found on acoustic guitars, this hole projects the sound out. And yes, it’s totally the guitar’s belly button.
Pickguard: That plastic piece guarding the area around the sound hole? That’s the pickguard, ensuring your aggressive strumming doesn’t scratch your guitar’s lovely finish.
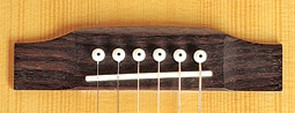
Bridge: No, not the one you walk over! The bridge is where the strings are anchored onto the body. It helps transfer the string vibrations into the guitar’s body, giving you that iconic guitar sound.
The bridge keeps the strings at the correct distance from each other in width, and the distance in height between the strings and the fretboard. At the acoustic guitar, the vibration of the strings is transferred by means of the bridge to the top the soundboard.
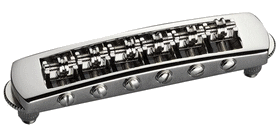
Saddle: This little ridge on the bridge supports the strings, and like the nut, it helps space them out evenly. It can be in one piece (usually on acoustic guitars) or in separate parts (electric guitar), one for each string. The function of the saddle is to put the string in the right place for the correct intonation.
For the acoustic guitar, the saddle is usually made of plastic or bone. The saddles of the electric guitar are usually made of metal, or sometimes of synthetic material.
Other Details
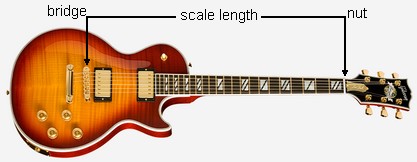
Scale length:
Scale length is the actual length of the vibrating strings. So this is the length of the strings between the bridge and the nut. The scale length affects playability. A shorter scale length has a shorter neck and is best suited for a quick position change.
Strings: Typically, guitars have six strings, but there are variations like 12-string guitars or basses with 4, 5, or 6 strings.
Strap Buttons: Found at the bottom of the body and sometimes on the upper part of the body or at the end of the neck. This is where your strap attaches, letting you rock out on stage hands-free.
